Friday, 11 December 2015

Orange Cardamom Glazed Madeleines

There's one thing that no one tells you when you get involved in Food Studies --no matter where you go, no matter what you look at, Proust's madeleine will eventually find you. Proust's À la Recherche du Temps Perdu, aside from being a classic of French literature, is based around the overarching theme of involuntary memory, which of course hinges on the humble tea cake that the French know and love.


            With their delicate scalloped edges and lightly browned crusts, madeleines are an elegant addition to any dessert spread. Even better, their dense interiors and conveniently tapered bodies make them an excellent pairing for dunking into coffee or tea.
            Now the one snag with madeleines is the specialized equipment required to make them - a madeleine pan. However, don't fret quite yet. If you don't have a madeleine pan that you bought on a whim during a vacation to France (which you subsequently buried in storage upon arriving home) these pans are easily available on amazon and in quite a few baking stores as well! I can guarantee that the investment is one worth making. Madeleines, though tasty plain, can be made in a wide variety of flavours for any occasion. As of yet, my favorite recipe has been the orange cardamom ones that I'm listing here. This is the second flavour I've worked out, as my flatmates attempt to keep up with a seemingly endless deluge of multi-flavoured tea cakes.
            With everything said and done, I hope you enjoy these little mouthfuls of buttery goodness. Who knows, maybe they'll conjure up memories of your childhood...or plans of a future holiday in the city of lights.


Ingredients

For madeleines:
-3 Large eggs (at room temperature)
-120g salted butter, melted (feel free to brown it for a bit of a caramel taste)
-170g flour (I use AP, feel free to us cake flour for a fluffier end product)
-130g sugar
-1 pinch of salt
-zest of one orange
- 8-10 pods of green cardamom, hulled and ground
-1/2 tsp. baking powder (optional)*
For glaze:
-2 tbsps. juice from your zested orange
-1/2c. icing sugar

Purists will tell you not to add baking powder due to its tinny taste. If you whip the eggs enough you can avoid using it, but really it's up to you in the end!

Methodology:
David Lebowitz suggests chilling the batter for a few hours or overnight before baking. In a rush? Make the recipe with 1tsp. of baking powder and preheat the oven to 400f/200c before starting.

Melt the butter, grind the cardamom and pinch of salt until it becomes a fine powder


Whip eggs and sugar together until thick and frothy, with a consistency a tad like wet paint


Add the melted butter, by now it should have warmed enough to not risk curdling the eggs

Throw in the remaining ingredients


At this point you can choose to refrigerate the dough to develop taste and lead to more explosive baking. If you're going the refrigerated route, preheat you oven to 400f/200c about twenty minutes before baking. Otherwise, simply proceed to the next step

Brush madeleine pan with melted butter, feel free to dust with flour if your pan does not have a non-stick coating or with granular sugar for a darker, browner shell

Fill indentation until about 3/4 full - the madeleines will rise substantially while cooking

Bake for 8-10 minutes until browned

Meanwhile, whisk orange juice and icing sugar (you can also add some Grand Marnier!) together to make a thick glaze, brush onto warm madeleines or dip them in it to coat


Monday, 21 September 2015

Rustic Apple Spice Muffins

Dappled sun and brisk breezes, warm cups of tea and trees laden with fruit, so begin the wonderful couple of months before winter is once more upon us. As I dig out coarsely knit sweaters and scarves I can't help but be excited for these winds of change. This fall has found me foraging, much like the rotund squirrels of the neighborhood, for local edibles. This has been largely facilitated by the wonderful non-profit group here in Toronto, Not Far From the Tree (NFFT). Indeed, because of this lovely organization I've been spending some much needed time away from my musty books, finding myself instead among the branches of various fruit trees, gleaning to my heart's content in a city which I've discovered to be an urban orchard of sorts.


As tends to be the case with apple season though, the delicious can often become overwhelming. Even after we've contributed a third of our fruit to local charities and another third to the owners of the trees NFFT sends the volunteers home with the last third. While that might not sound like much, it has provided our home with plentiful dozen upon dozen pounds of apples which have manifested themselves in various forms. Uses have spanned from the obvious; pies, crisps, waffles salads to the unusual; such as cooked with sausage, onion and spinach, or mixed with into coleslaw. Future projects will likely include apple pickles, doughnuts and fritters but for now lets focusing on something a bit cozier, muffins.

More fruit than muffin, these moist, spiced bundles of joy are loaded with chunks of apples and brimming with rustic charm. While they might not be winning any beauty pageants, they are oh so good with a hot mug of tea or as a morning pick me up to spike the blood sugar a tad. While I've yet to try them with wholewheat flour I can't help but feel that they'd pull it off!

Ingredients

Dry:
2c. flour 
1 tsp. baking soda
1/2 tsp. salt
2 tsp. cinnamon
About 1/4 tsp. freshly ground nutmeg

Wet:
1 3/4c. sugar
1/2c. light olive oil
1/4 c. apple sauce (preferably unsweetened)
2 large eggs
1 tsp. vanilla extract or the seeds of half of a vanilla bean

Filling:
4 cups of apple, peeled and chopped small

Topping (optional):
Quick oats


1) Preheat oven to 350, grease a muffin tin (the top too as these make for big muffins!)
2) Peel and chop apples, cover with lemon juice if you want to avoid oxidation 
2) Combine dry ingredients
3) Mix oil and sugar until homogeneous
4) Integrate the rest of the wet ingredients
5) Combine wet and dry ingredients, stirring until just combined
6) Fold in apples and parcel into the muffin pan, dust tops with quick oats if desired
7) Bake for 18 or so minutes until browned and a toothpick inserted into the core comes out clean


Wednesday, 15 July 2015

Citrus and Almond Cake


Muggy. Hot. Humid. These are all words that many a Canadian loves to drop in reference to our sometimes overwhelming summers. As a people exposed to radical weather all year long we've grown into proficient complainers (though perhaps not as the global champions, the much acclaimed Parisians), ever longing for a milder climate we tend to attack the mercury's verdict, when it's cold it's too cold and when it's hot...well of course it's too hot!
                From a culinary perspective however, we're forced to acknowledge that no, the grass is not always greener on the other side. Our weather allows us to benefit from the best of both worlds, where we gripe about weather, you rarely hear any complaints about the wide range of delectable dishes which we dive into with relish all year long. While our winters are perfect for warm bread, pot roasts and soup, our summers lend themselves very well to leafy salads, grilled fare and light, sweet desserts. This brings us to today's recipe, a delicate olive oil based cake devoid of wheat flour which is inspired by the summery cuisine of North Africa. This wholesome cake is somewhat custardy in consistency, relatively high in protein and an easy gluten free option. In addition to this, the cake is amazingly moist, due to the peculiar method of integrating the whole citrus to the batter so get your blenders out folks!

                Desserts such as these are best served after a long outdoor dinner, preferably late in the evening alongside good conversation, appearing as an unexpected exclamation mark wrapping up a convivial evening. I suggest eating this cake cool or at room temperature, with a cup of mint tea and a substantial side of summer.

Ingredients:
1 Orange
1 lemon
1/3 c. Olive Oil
3/4 c. + 2tbsp. Sugar
4 Eggs
3/4c. Of ground whole almonds
2 tsp. Baking powder
1/4 tsp. Salt
Orange blossom water (Optional)
Icing sugar for garnish

Wash thoroughly and boil  the lemon and orange whole for approximately half an hour, until softened


While the citrus boils, grind your whole almonds to make a coarse flour, add baking powder and salt

Grease an 8 inch pan and preheat the oven to 350 degrees

Let  the citrus cool and carefully slice the fruit into chunks large enough to be processed in a blender or food processor, if like me you lean towards impatience, make sure not to burn yourself as you cut into the fruit! If you see any seeds, feel free to discard them, however don't worry terribly as any ones you might miss are about to be pulverized

Using your machine of choice, add the olive oil and render the citrus into a coarse mush, feel free to add a tablespoon of olive oil or two more than suggested in the recipe to ease the process if the fruit is not blending easily

Add the eggs to the mixture, making sure it's cool enough not to curdle the eggs and blend into a puree.


Combine flour mixture, puree and sugar, pour it into the pan and bake for one hour until browned and set, brush while warm with orange blossom water


Feel free to garnish with a dusting of icing sugar, almonds, candied citrus peel or zest


Sunday, 14 June 2015

Double Chocolate and Zucchini Muffins

For those of us you who are familiar with the cooking of the 90's and early 2000's you've probably made your peace with the idea of eating vegetables and legumes for dessert. There was the carrot cake resurgence, the attack of the black bean brownie and the West's new fascination with traditional Asian red bean sweets (look at us, we're multicultural, we do yoga and eat beans for dessert!) so at this point, I'm pretty sure that no one really bats an eyelash at the idea of eating a zucchini muffin...certainly one that is saturated with chocolate. As pertains to healthiness, I'm not about to tell you that this recipe is some kind of athletic rocket fuel or weight loss miracle, what it is though is a wholewheat muffin which you have the option of sweetening naturally and which relies on apple sauce and eggs to guarantee a low fat content all the while remaining incredibly moist. Seriously, you'll have no trouble passing this off as a normal muffin or cupcake, certainly if you slap a dollop of nutella on it as icing (oops, so much for healthy!) This ain't your standard lump of industrial palm oil and glucose syrup that's certain...oh and aside from tasting as good as any less forgiving muffin, it's a fast recipe too!


Dry Ingredients
2 1/2 cups whole wheat flour or white whole wheat flour
2/3 cups unsweetened cocoa powder
1.5 teaspoons baking soda
3/4 teaspoon salt
1 cup chocolate*


Wet Ingredients
4 tablespoons olive oil
1 cup honey or sugar
1 teaspoon vanilla
4 eggs
2 cup shredded zucchini (about one large zucchini)
1/2 cup applesauce
1cup milk

* In my case, I like a mix of 72%chunks and bittersweet chocolate chips, really it's up to you! Though if you go for milk chocolate I'd cut the sugar in the actual muffins to balance it

Instructions:

Preheat oven to 350

The approach to making these muffins is simple enough:

First up wash the zucchini, take off the tips and put it through a blender with the milk, applesauce and oil.

Combine this mixture with the rest of the liquids. Mix the dry ingredients minus the chocolate and combine the, with the wets until homogeneous.

Add chocolate, stir briefly and bake for 20 minutes!


Friday, 13 March 2015

Rehabilitating Custard: A How-to Guide to an Age-old Favourite

Custard has been around for a long time. A quick glance at some of the earliest cookery books reveals it being used as a dessert or sauce, making use of two main ingredients in Western cooking, dairy and eggs. While custard was originally something of an upper class food or one reserved for celebrations, the improvement of general living conditions allowed for its consumption to gradually become democratized as it emerged as a convenient one pot dessert or sauce that was easy enough to make and accessible.

In recent years though, be it due to the rise of vanilla pudding or the strange British preoccupation with the canned and powdered variety, homemade custard has fallen from grace.While the most likely culprit of this is the arcing growth of post-WWII convenience consumption, it seems strange indeed that instant custard has remained en vogue this long. While a host of people move back to baking their own bread and making their own cheese, processes which are significantly more time consuming than custard making, this age-old dish remains largely neglected. A little while ago we hosted some friends and they were completely blown away when they had hot homemade custard on berries like the one pictured in this post, little did they know how fast and simple it was to make!


The first thing you need to know about custard is how incredibly versatile it is. Custard can be served drizzled over berries or on pie (as seen in the UK), poured straight and left to sit in the fridge to become American pudding. As pudding it can be flavoured with melted chocolate, jam or other flavours. Custard can sandwich cookies together, fill nanaimo bars or be frozen to make ice cream! It can be made thin to pour over waffles or thick to stand out on its own, it can even become a savoury sauce which can go oh so well on fish with some lemon zest, salt and dill or as a filling for a quiche!

Custard, adaptability is thy virtue and simplicity thy name. 

So once you've wrapped your head around how awesome custard is. it's about time to give it a go!

Custard Basics

Custard is necessarily composed of two ingredients: eggs and dairy, once these ingredients are whipped into a homogenous mass they are cooked at low heat which allows the eggs and milk to bind, thickening together to make custard.

Eggs & Fat: The more eggs and fat (ie cream over milk) that you add, the richer the custard. Similarly, the amount of eggs you add dictates how yellow your custard will be as the colour comes from the egg yolks. A very rich custard would be made using egg yolks and butter or cream, while a light custard might use whole eggs and milk. The custard pictured above was made with two eggs and a bit of milk, notice the rich yellow colour and thickness? It was high on egg content.


Sweet: For sweet custards sugar is very helpful as a thickener, a large quantity is not necessary as a touch is enough to bring out the flavour of the eggs and dairy.


Savoury: As savoury custards lack sugar, a higher fat content and/or a longer cooking time are necessary. Traditionally thickeners such as flour, gelatin or corn starch can also do the trick. Though I lean towards adding more fat to my custard to thicken it, using butter, cream, sour cream and even mixing some cheese it should it suit the mood. In some cases a spoonful of flour can help thicken the sauce but remember that the more thickener you add, the less flavour there is and the less rich the sauce tastes.

Flavouring: Lemon zest or vanilla (seed or extract) are two of my favorite flavourings for custard. Otherwise feel free to add a bit of jam or melted chocolate at the end but keep in mind that you don't want your additives to be too hot as that can lead to the biggest issue with custard...

Curdling: It is necessary to keep in mind when you make custard that the biggest risk is that your eggs curdle. This leads to a custard that is somewhat grainy as opposed to velvety and which will taste more "eggy". If you do overcook your custard, it isn't the end of the world, while it won't win any awards its still quite tasty so don't skip out on custard-making out of fear.

How to avoid curdling: A low, even heat and constant movement is key here. The best tools for making a smooth custard are a double-boiler and a whisk. The double-boiler allows for a low and evenly applied heat and the whisk keeps the custard in motion.

Technique: Make sure to whisk constantly and evenly, reach into every corner and maker sure that the mix does not stick anywhere. Don't hesitate tilt the pot as you whisk to maker sure that the mixture is not sticking anywhere.

Don't have a double-boiler? Feel free to improvise one by putting a small pot in a large one with hot water in it or simply live on the wild side and do without. As you'll notice in my photos, I don't tend to use one as it makes for a faster process. However, the downside is that chances that your custard curdle are much higher without and you'll have to compensate with more watchfulness and some seriously fast whisking. Using this method, your custard will thicken much faster so watch out and move quickly to take it off the burner once it's thick.

So bellow this I've attached a few photos of the custard-making process, this made enough custard for two puddings or as topping to three or so ramekins of berries.

As for actually making the custard:

I combined 2 eggs, slightly more than 1/8 c. sugar with a dash of vanilla extract and perhaps 1/4 cup of milk.


Whisked it over medium-low heat for a few moments

And poured over fresh strawberries


Served with a bit of dark chocolate and icing sugar as garnish, that's it!


Sunday, 25 January 2015

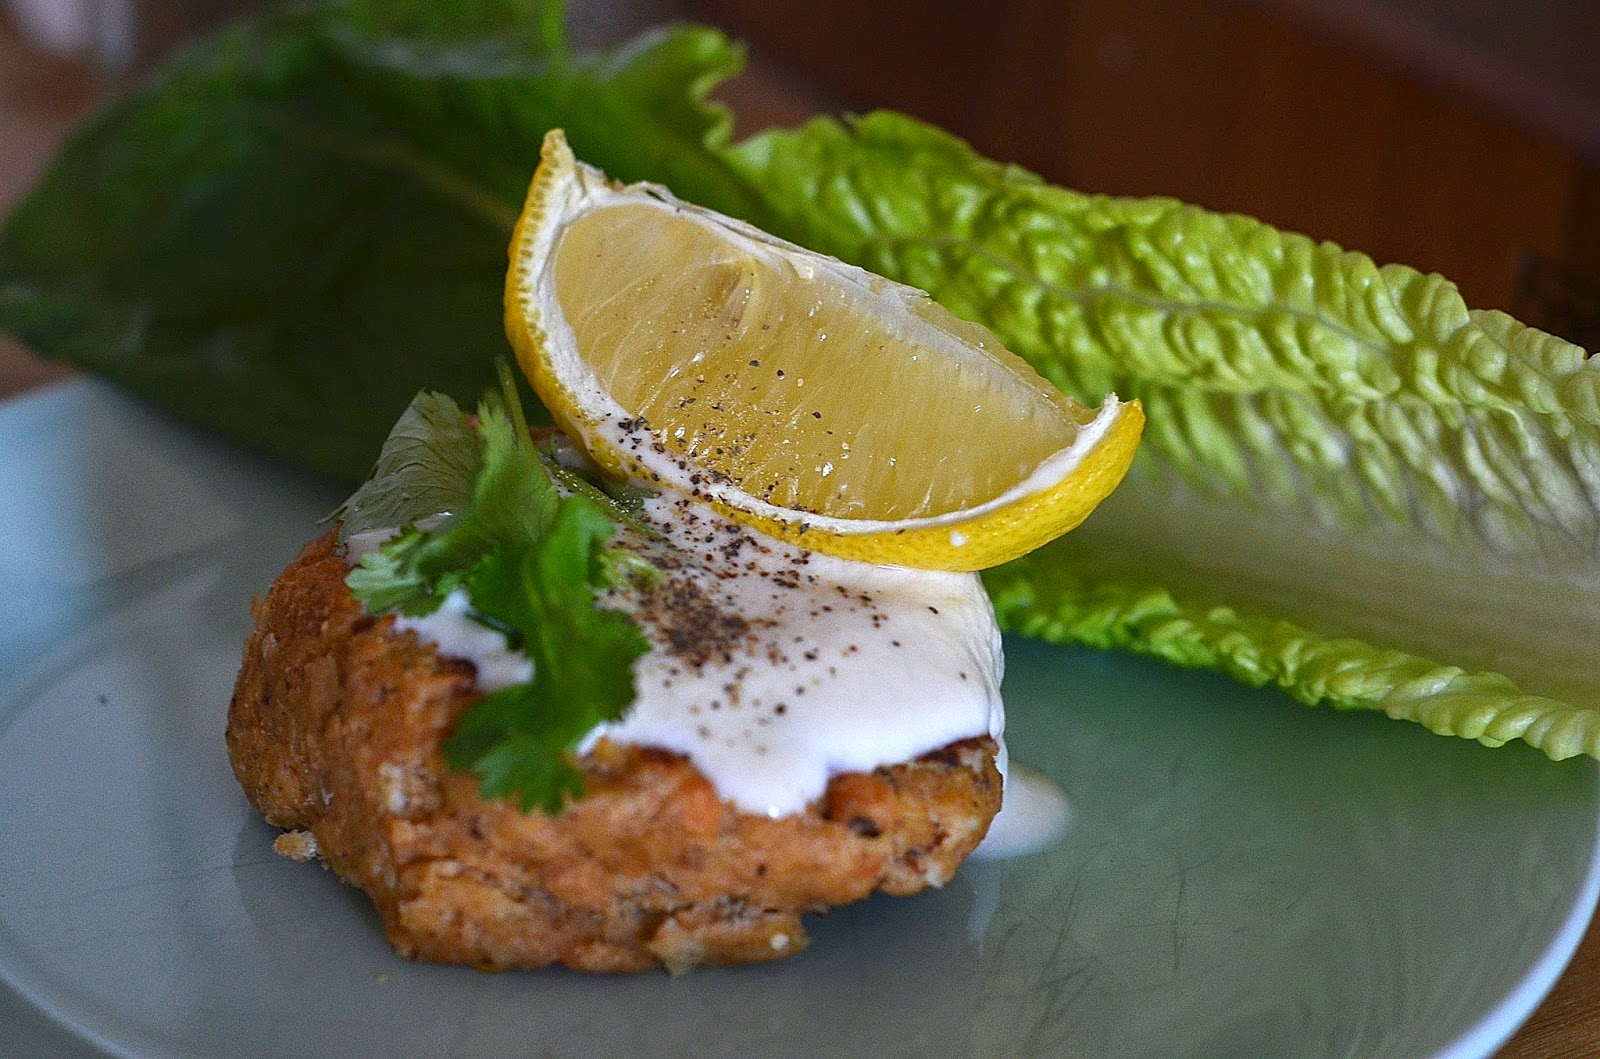
Simple Salmon Patties

Though I'm ever one to grumble about modernity, convenience society and fast food, sometimes  I confess, speed is of the essence. This same speed often demands sacrifices, most commonly it means cutting down on health benefits or flavour, often with the unfortunate side-effect of leaving a cold hard pit of disappointment in the immediate aftermath of one's hasty dining experience. So shedding my usual identity as an irritable old codger, I've decided to roll out a recipe that is not only fast but tasty and healthy to boot!


These salmon patties are packed with protein and healthy fats and are convenient not only due to their speed but because they can be eaten in burgers or all dressed up in yogurt, lemon and fresh herbs. Ever better than this, they're portable and easy to reheat, a great little lunch to make ahead and take on the go.

Preheat oven to 425
Ingredients:
1/4c. Roasted nuts, ground (I used almonds though walnuts are also great)
1/4c. Split pea or lentil flour (You can grind them yourself in a coffee grinder, it's a tad on the coarse side but it works!)
1 Yellow Onion, diced
2 cans of salmon (213g. each) debonned
2 eggs
2 pinches of wasabi powder (optional, can be substituted with whatever spices tickle your fancy, coriander would do the trick!)
Zest of one lemon
Juice of one lemon
Salt and pepper to taste

The recipe is simple enough, as promised.

Dice the onion (you can pass it through a food processor)

Grind the nuts and legumes if necessary (Nuts can be coarser, up to you!)


Press as much liquid as possible from the salmon 


Combine all ingredients together, make sure to incorporate the eggs thoroughly


If you feel that the mix is too wet, feel free to add some additional nuts, legumes or some wholewheat flour to bind it, you want a mix that keeps its shape when formed into a ball


Lightly oil a cookie sheet

Ball or shape the patties


Bake until browned

Friday, 2 January 2015

Crossing Boundaries: My take on Siopao Asado


For those of you not familiar with it, siopao asado is a delicious Filipino  dish, simple as that.  This soft steamed bun is stuffed with mouthwatering pork which is coarsely chopped and cooked until tender and still slightly chewy. Does this sound at all familiar? A tad like Char Su Bao and a variety of other sweet and savoury buns that dot Asian cuisine perhaps? Siopao asado finds its roots, despite its semi-Spanish name, in the convenient handheld meals which have long travelled alongside Chinese merchants and colonizers. The veneer of Europeanism which is lacquered onto the name situates these buns at the crossroads of Chinese and Spanish cultures in the rich melting pot of the Philippines.


 I chose the title “Crossing Boundaries” for a variety of reasons. While siopao asado is definitely an example of crossed boundaries, my take on the recipe has changed it even further, putting a Korean spin on it by using gochujang and integrating cabbage and onion to add my own little twist, as well as some veg. A lot of these age old dishes exist in many a permutation and adding my own touch to it I just throws another layer onto an endlessly adaptable dish. Feel free to play with the filling and change it to match your tastes, it’s truly the nature of the beast to do so!

The title of the post is also relevant for me in another way. This recipe was given to me by my fellow food scholar Adrian whom I've had the privilege to work, laugh and procrastinate with this semester. His knowledge of siopao’s historical roots are far more academic than this little blurb was ever meant to be and I guess what I mean to say is that I've officially caved, I have to acknowledge it; resistance is futile, my entire life is coloured by academia...oh well!

Ingredients

For the dough I used the original recipe from http://www.panlasangpinoymeatrecipes.com/siopao-asado-recipe.htm with the minor modification that I cut the sugar by half a cup and boosted the rising times (often doubling them)

Filling:
-1kg of pork and vegetables. While the original recipe calls for only pork, I used about half pork, half cabbage, onion and green bean. For all of the vegetarians and vegans you can also use vegetables entirely, patted dry tofu would probably be a good addition!
-1/2 head garlic, crushed-2 medium size onion, minced1/4 c. soy sauce1/4 c. sugar1/4c.  Gochujang3 Tbsp Rice vinegar
2 Tbsp cornstarch

Mix the dough and knead about eight minutes until smooth and elastic. Set aside to rise for an hour or so.


Prep meat and vegetables, crushing the garlic and chopping vegetables and pork into bite-sized pieces. Remember, this is a hand food, you don't want huge strands of pork of cabbage plopping out if you're eating on the run.


Heat some oil in a deep pan or pot, brown the pork and onions at medium heat.


Add garlic, cook until fragrant. 


Deglaze with the vinegar and soy sauce, add the gochujang and sugar


For pork buns: Simmer on low heat for as long as possible (minimum 45minutes) this slow cooking makes for a more tender filling and lets the flavours develop. Should it start to stick you can add broth or other seasoning to taste (sugar, soy, vinegar to taste)


A few minutes before you finish cooking, add the cabbage and other vegetables cook until desired though do remember that they will steam for 10 minutes and you don't want to overcook them. 5 to 10 minutes in the sauce will suffice to let the flavours mingle. 


For the vegetarian option: Cook the vegetables in the sauce for 5 to 10 minutes then feel free to let the mixture sit at room temperature while the buns rise to absorb flavour.


Should the mix need thickening dissolve the cornstarch into water and add to the mix, heat for 5 minutes or so until thick


Once the dough has risen, flatten it


Cut the dough into equal wedges


Roll into balls


Let proof under a damp cloth


Once the dough is done proofing, flatten the balls


Fill dough with a scoop of filling and carefully fold the edges of the dough together by pinching it closed


Continue pinching the dough, combining each pinch with the last one to make folds


Once there is just a lip left


 fold it into the other pinched segments in one fell swoop


Grab all of the dough at the top and twist to seal, this will also provide the pleats that are an iconic feature to these buns


Steam the buns in a bamboo steamer or double boiler, on lettuce or wax paper. If you're slumming it like me and lack not only a steamer but also wax paper, feel free to use a colander over a pot of boilling water with a lid. Though you'll want to grease the steal to prevent the buns from sticking.


Steam for 8-10 minutes until dough is firm, remove buns from steamer (or umm... colander) and let rest, being careful not to burn yourself.

Enjoy on the run

Or alongside a nice cup of green tea!